Learn How to Solve Absolute Value Equations in 3 Easy Steps!
The following step-by-step guide will show you how to solve absolute value equations and absolute value functions with ease (Algebra)

Welcome to this free lesson guide that accompanies this Solving Absolute Value Equations Tutorial where you will learn the answers to the following key questions and information:
How to solve an absolute value equation
How to solve an absolute value function
How to find both solutions to an absolute value equation
Why is absolute value always positive?
This Complete Guide to Solving Absolute Value Equations includes several examples, a step-by-step tutorial and an animated video tutorial.

*This lesson guide accompanies our animated Solving Absolute Value Equations Explained! video.
Want more free math lesson guides and videos? Subscribe to our channel for free!
Intro to Solving Absolute Value Equations
Before you work on a few absolute value equations examples, let’s quickly review some important information:
Fact: Any value inside of absolute value bars represents either a positive number or zero.
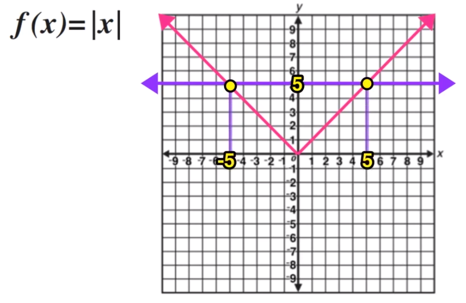
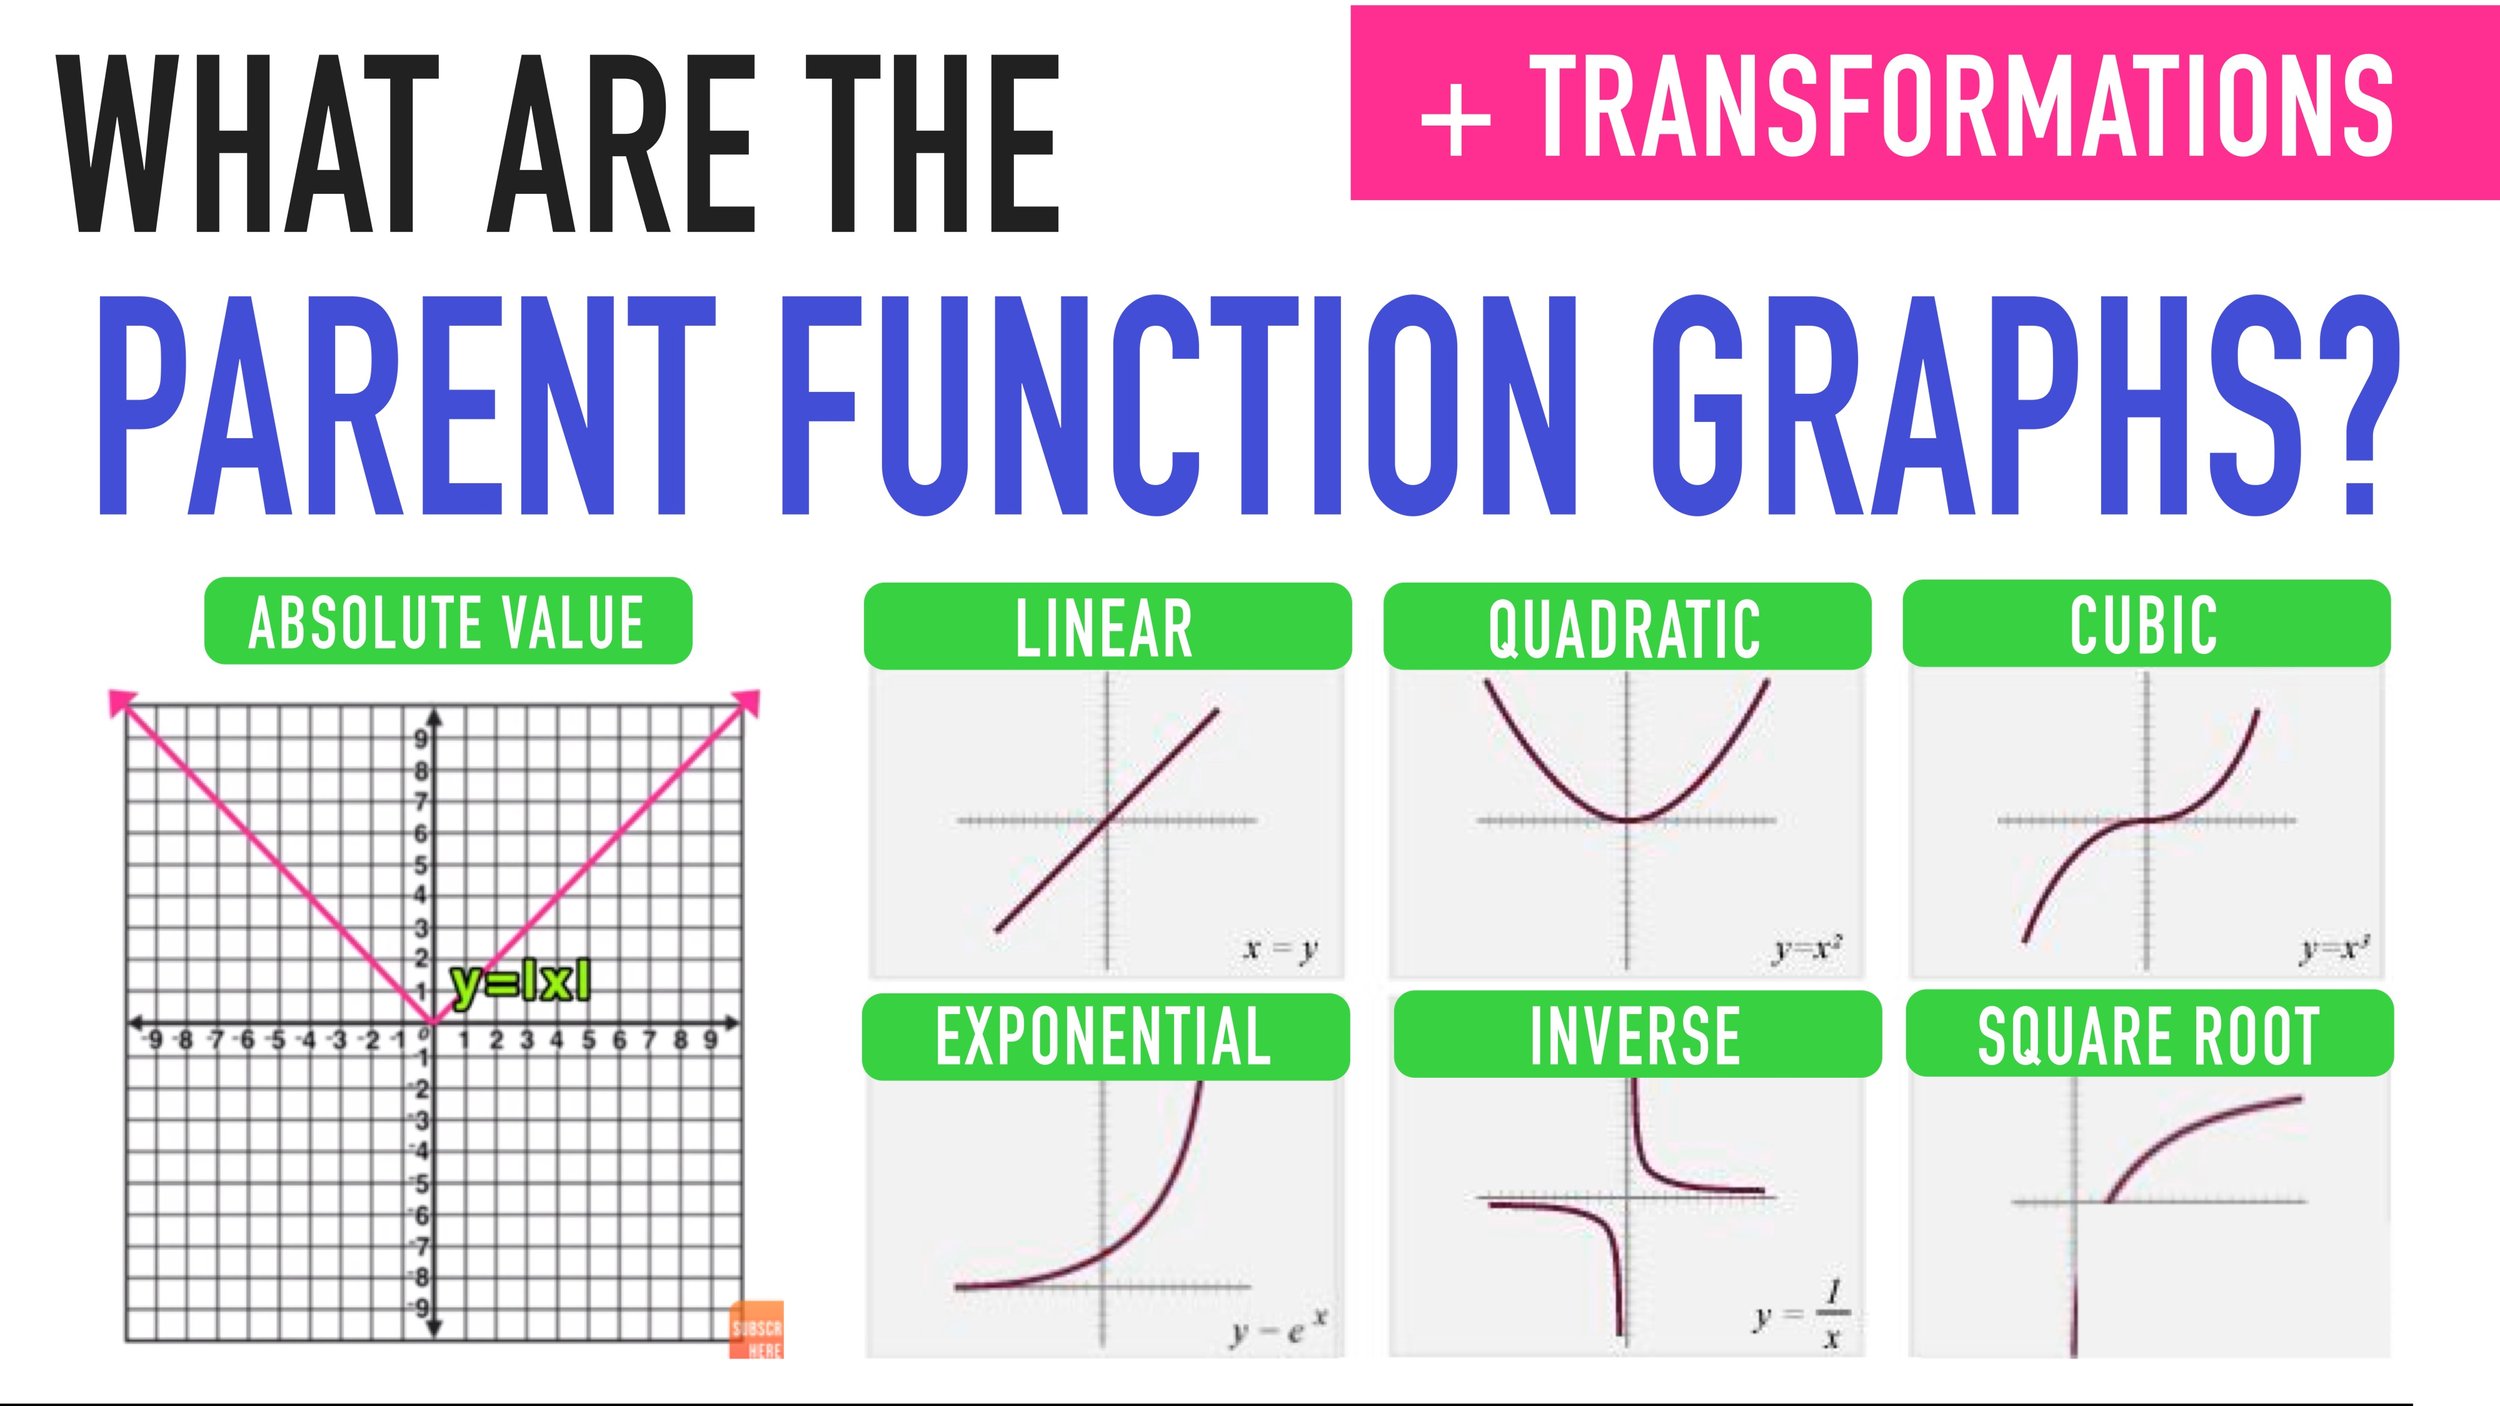
Notice that the absolute value graph in Figure 1 has a range of y is greater than or equal to 0 (it is never negative)


Figure 1: The parent function for absolute value.
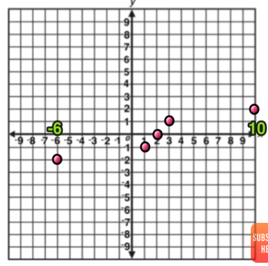
Furthermore, consider the example below:

There are two values that would make this equation true!

The absolute value of 5 AND the absolute value of -5 both equal positive 5.
This should make sense when you graph the line y=5 over the absolute value function graph because you can see that there are two intersection points, and thus two solutions.
Absolute value functions can have up to two solutions!
Now you know that ABSOLUTE VALUE EQUATIONS CAN HAVE TWO SOLUTIONS.
Now you are ready to try a few examples.
Solving Absolute Value Equations Example #1

We will be using the following 3-step process that can be used to solve any absolute value equation:
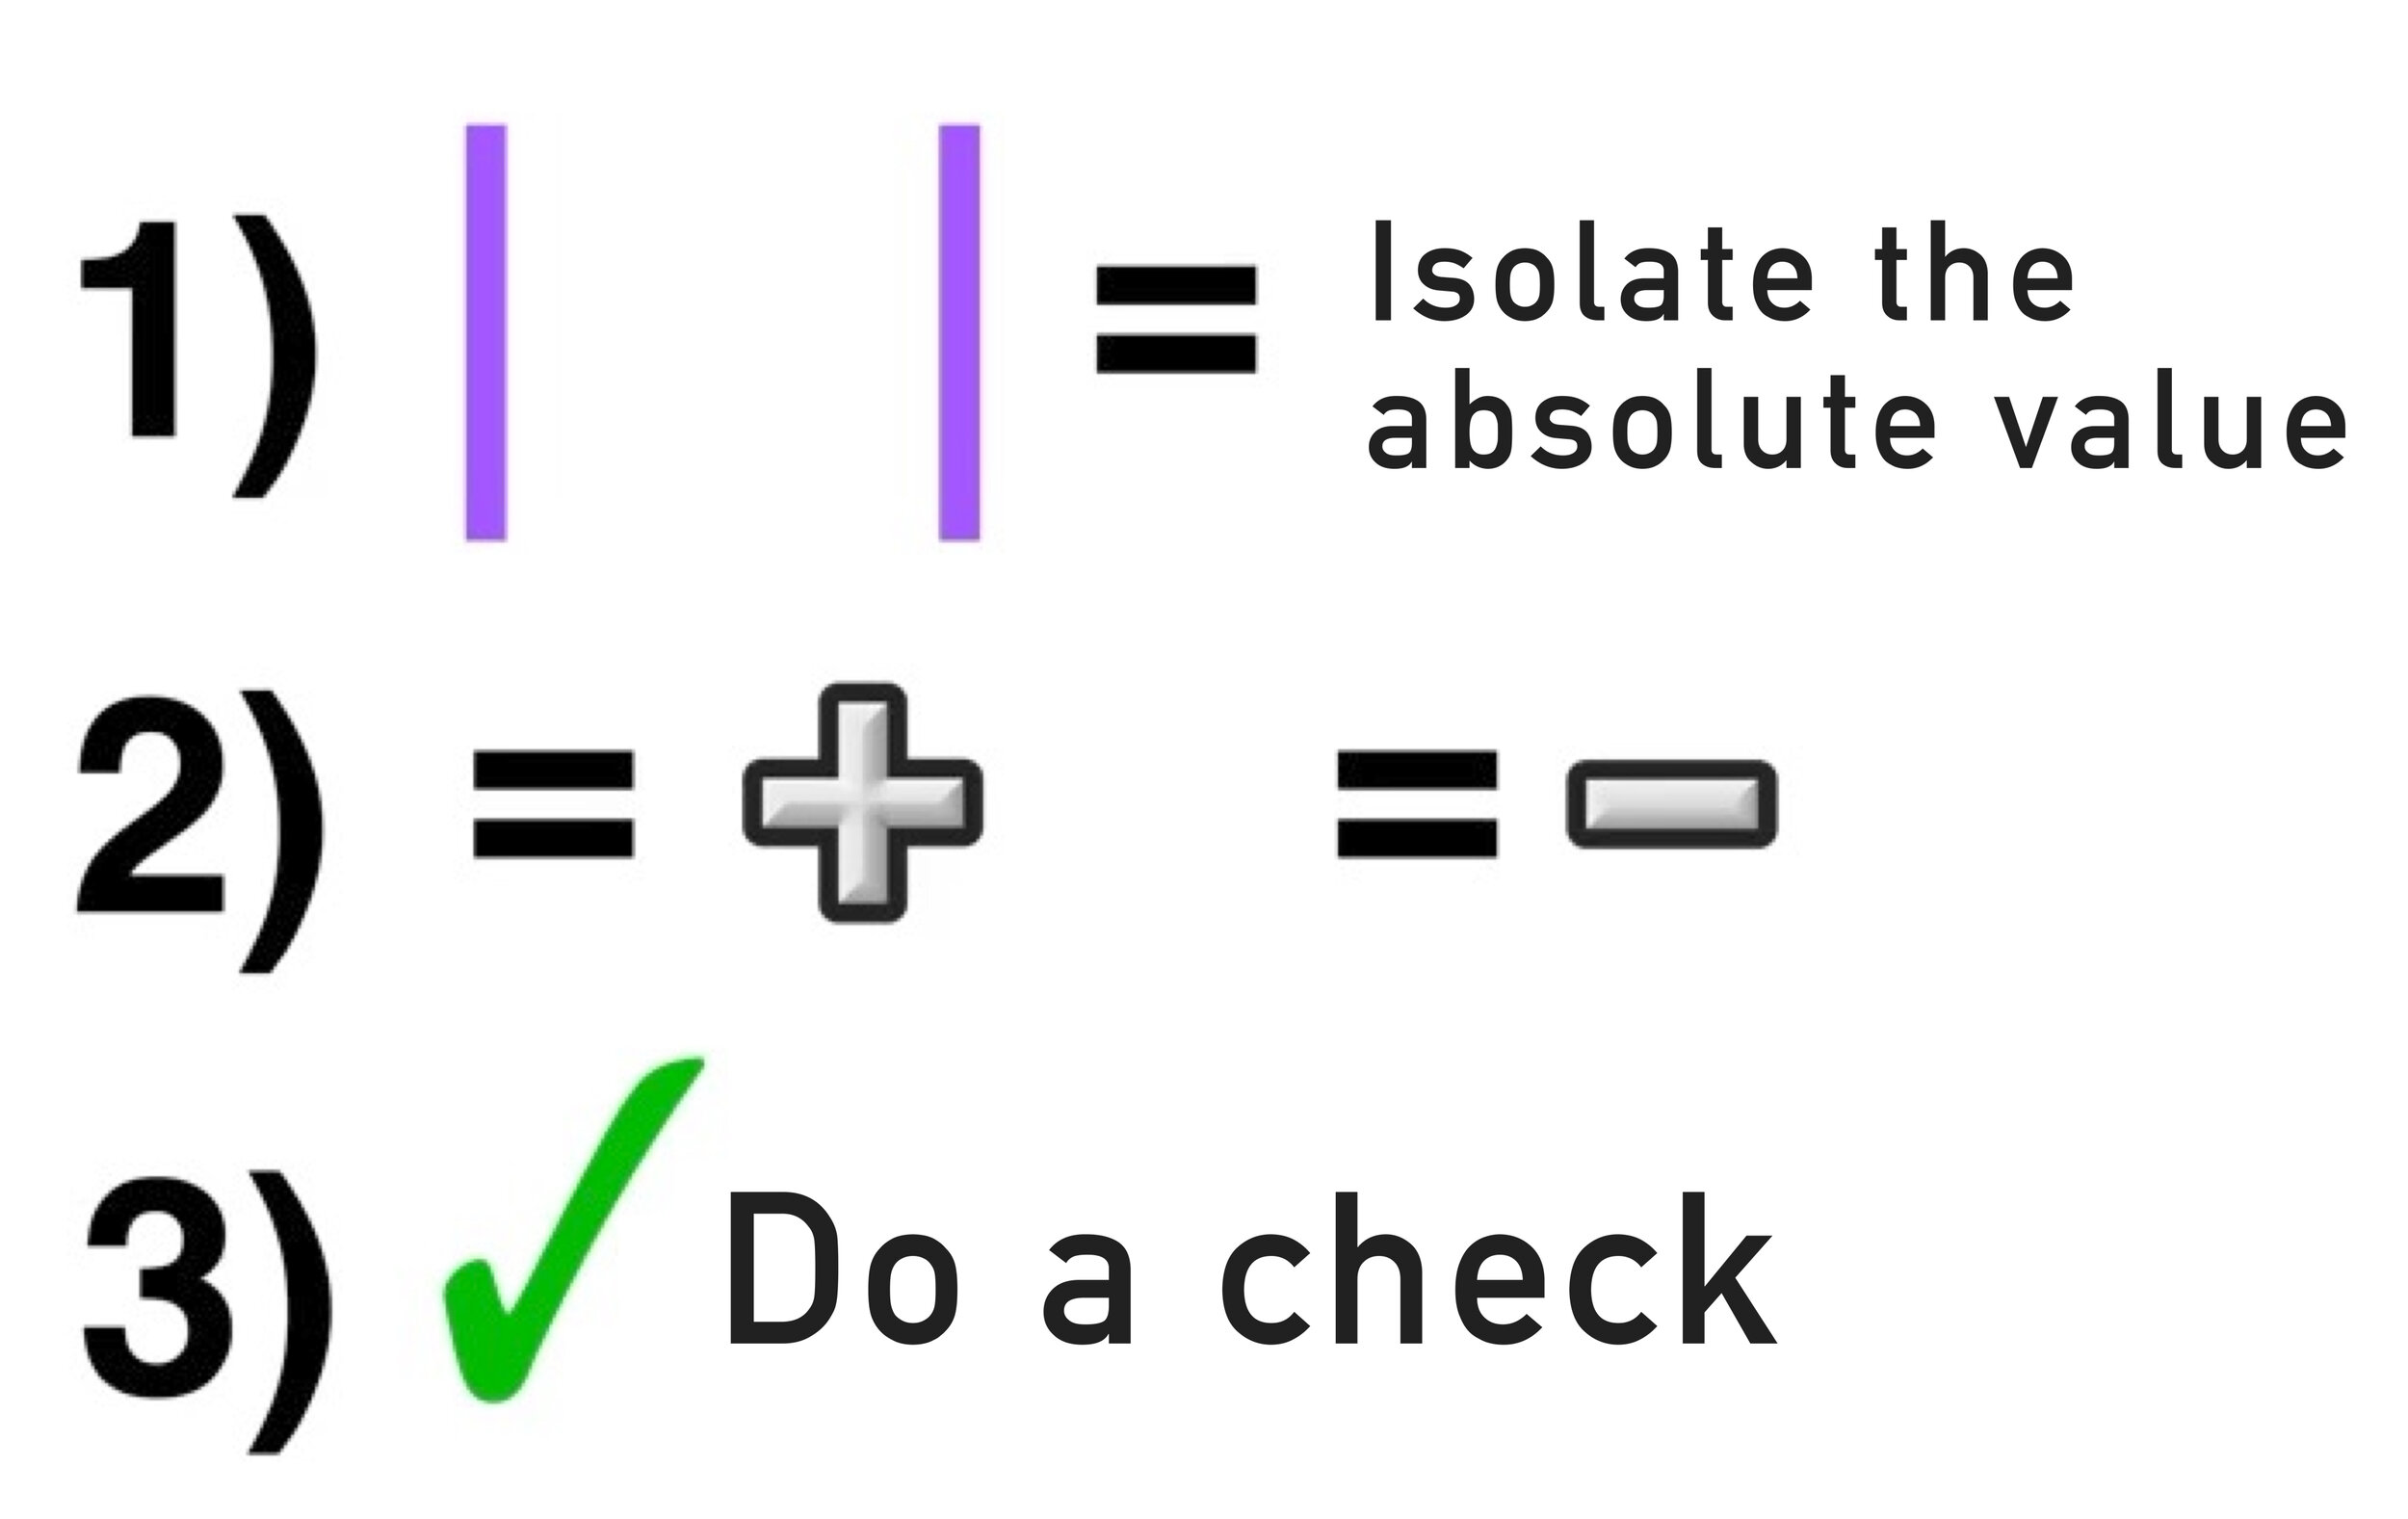
STEP ONE: Isolate the Absolute Value
In this example, the absolute value is already isolated on one side of the equals sign, which means that there are no other terms outside of the absolute value, so you can move onto step two.
STEP TWO: Solve for Positive AND Solve for Negative
For step two, you have to take the original equation |x+3| = 6 and split it up into two equations, one equal to POSITIVE 6 and the other equal to NEGATIVE 6. You also get rid of the absolute value bars.
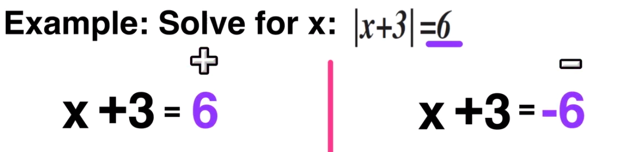
Set up two equations (positive and negative) and ditch the absolute value bars.
Now you just have to solve each equation for x as follows:
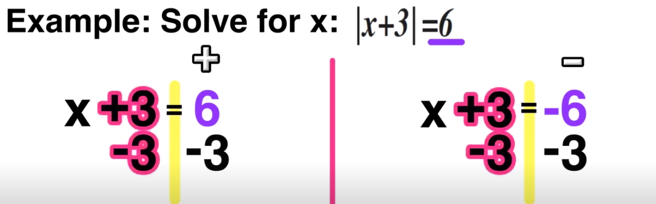

And now you have concluded that there are two solutions to |x+3|=6, x=3 and x=-9.
STEP THREE: Check Your Answer
Finally, do a quick check by plugging both answers into the original equation, |x+3|=6, to make sure that they are correct:

Left: replace x with 3. Right: replace x with -9

Both equations are true.
Since the checks worked out, you can conclude that:
Final Answer: The solutions to |x+3|=6 are x=3 and x=-9
Solving Absolute Value Equations Example #2

Again, you will follow the three-step process to solving this absolute value equation:

STEP ONE: Isolate the Absolute Value
Unlike the last example, the absolute value is not already isolated on one side of the equal sign, because there is a +8 outside of it that needs to be moved to the other side as follows:

Step One: Isolate the absolute value!
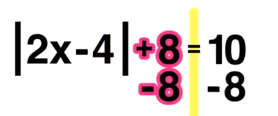

Now the absolute value is isolated.
Now that you have isolated the absolute value on one side of the equal sign, you are ready for the next step.
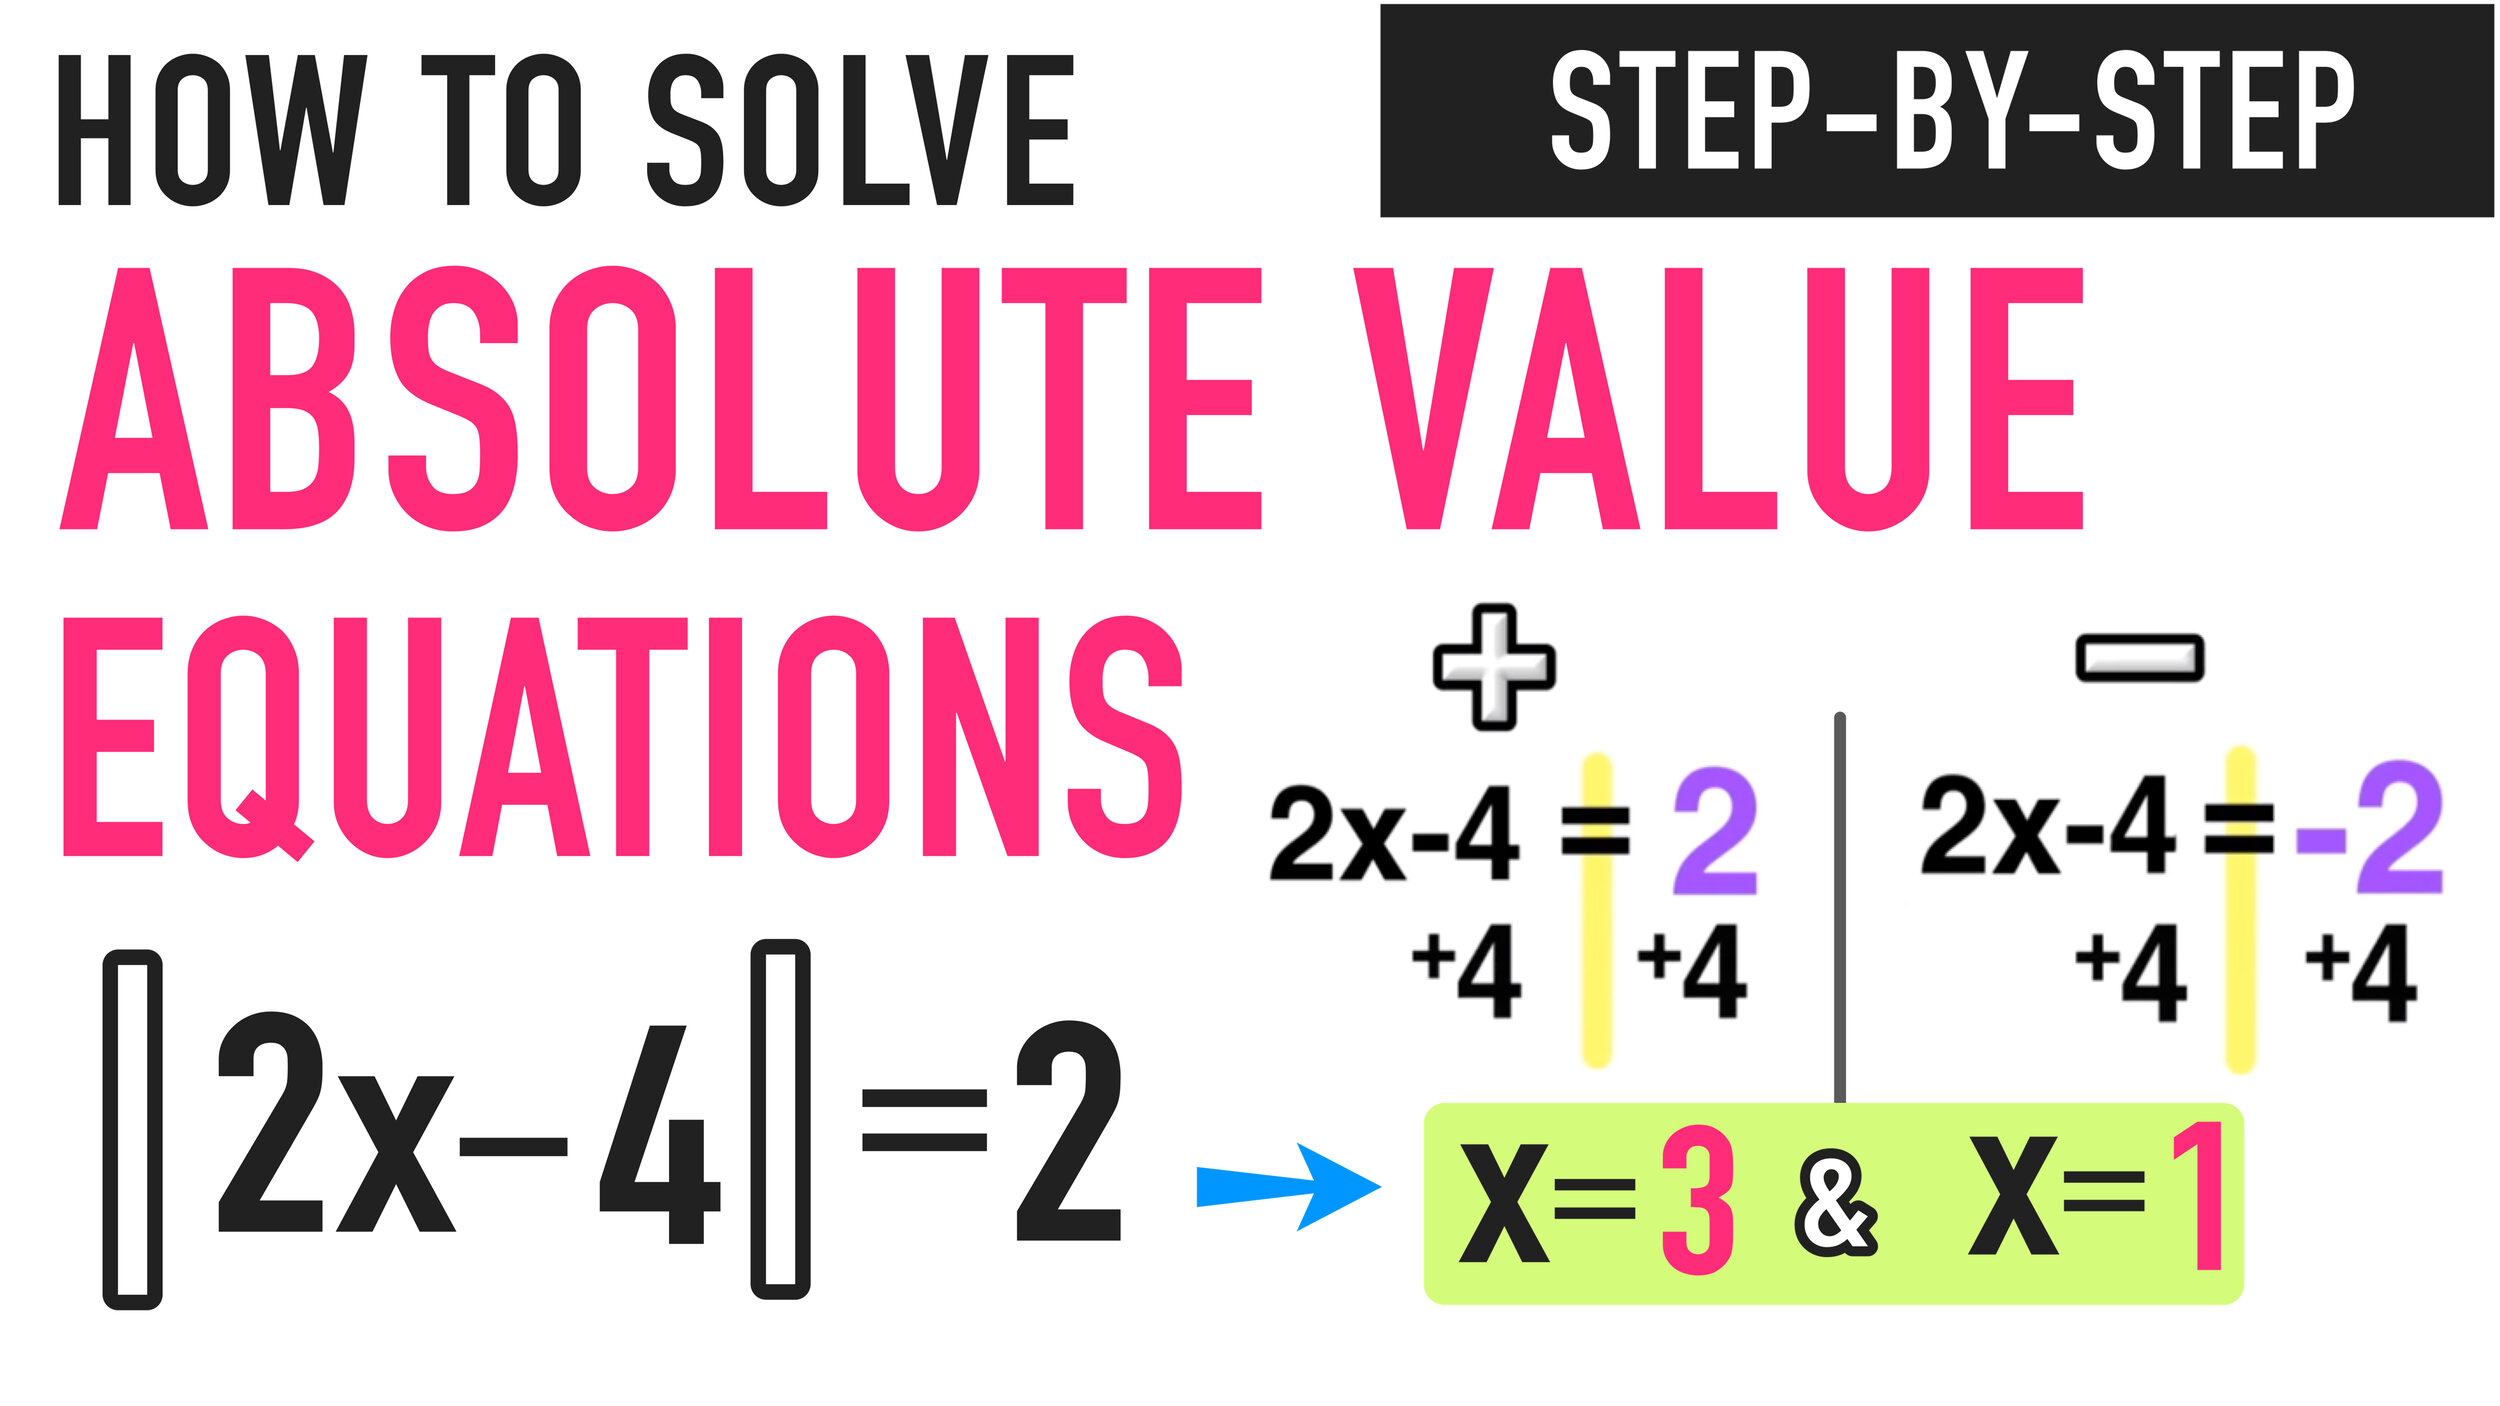
STEP TWO: Solve for Positive AND Solve for Negative
The next step is to ditch the absolute value bars and solve the following equations:
Positive: 2x-4=2 and Negative: 2x-4=-2
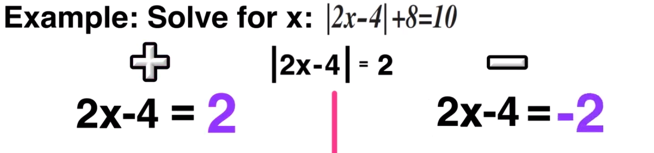


Now you have TWO solutions: x=3 and x=1
STEP THREE: Check Your Answer
The final step is to plug both solutions, x=3 and x=1, into the original equation |2x-4|+8=10 and verify that each solution checks out and you are finished!
Go ahead and check the solution to Example 2 on your own! Did it work out?
Still Confused?
Check out this animated video tutorial on solving absolute value equations!

Looking for more practice with absolute value?
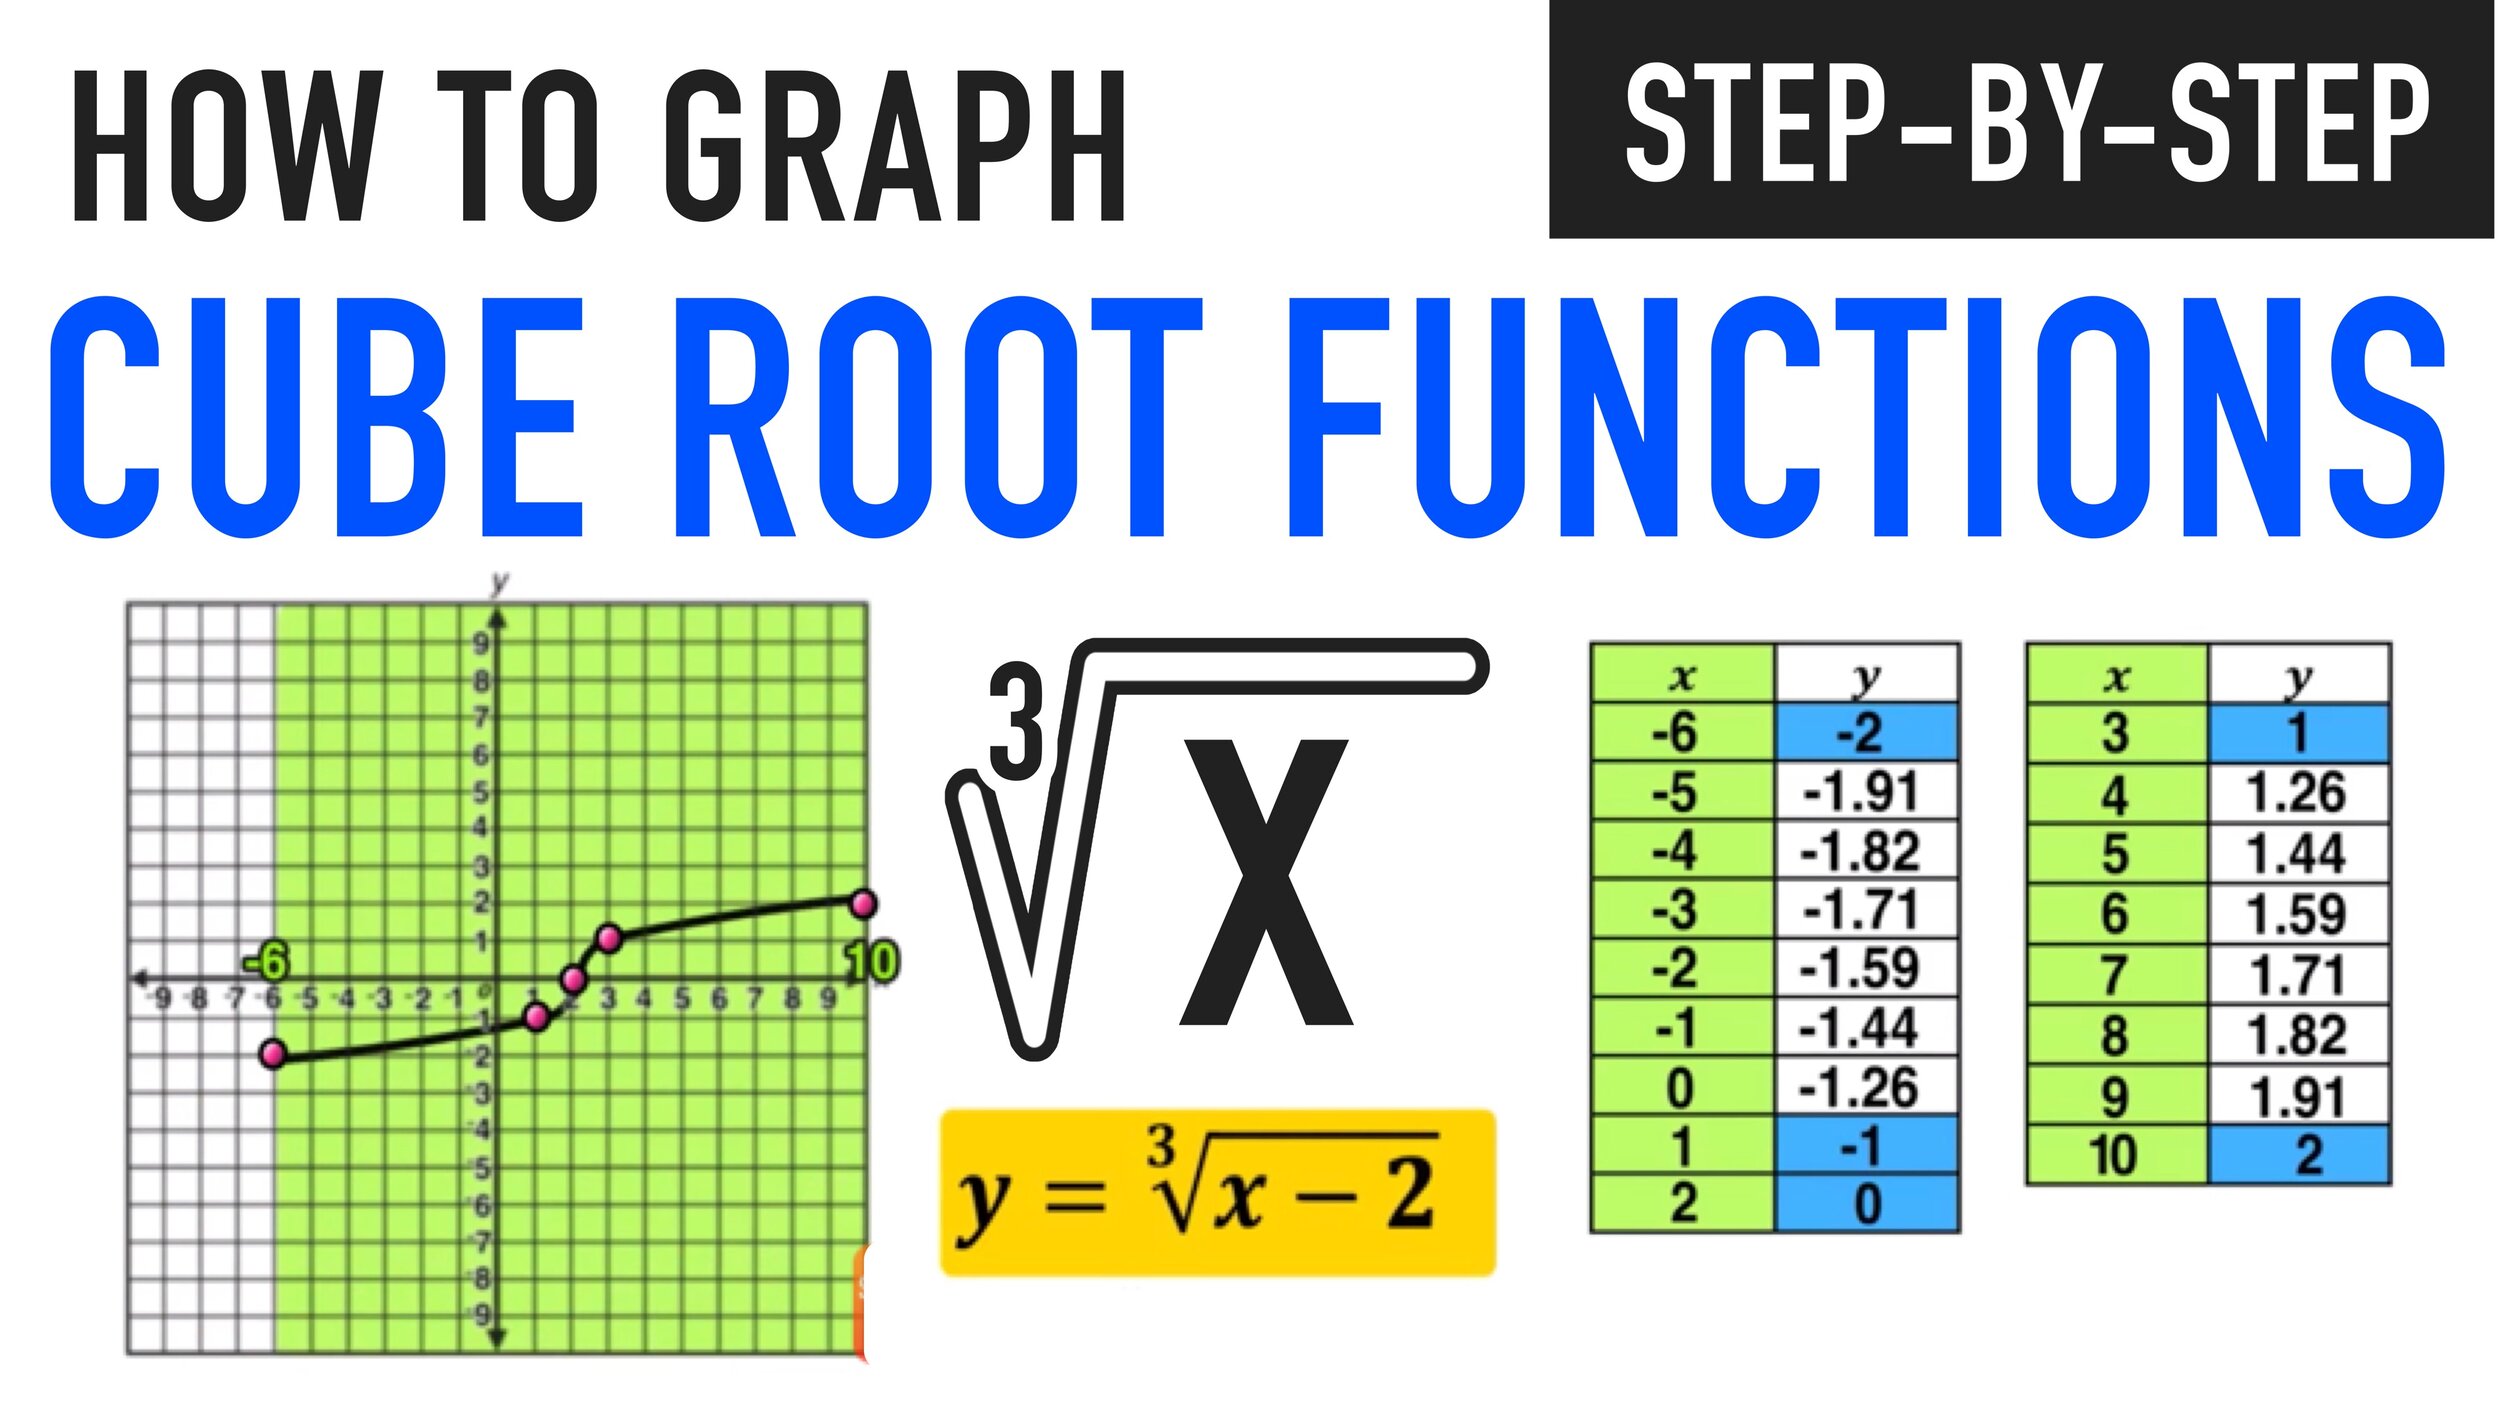
Check out the following free cube root resources:
Free Tutorial
Absolute Value Calculator Basics: How to Graph and Solve Absolute Value Equations
How to Find X and Y Intercepts of a Function Explained!
Keep Learning with More Free Lesson Guides:


Have thoughts? Share your thoughts in the comments section below!
(Never miss a Mashup Math blog--click here to get our weekly newsletter!)
By Anthony Persico
Anthony is the content crafter and head educator for YouTube's MashUp Math. You can often find me happily developing animated math lessons to share on my YouTube channel . Or spending way too much time at the gym or playing on my phone.