How to Find Domain and Range of a Graph—Step-by-Step

Comment

How to Find Domain and Range of a Graph—Step-by-Step

How to Find Domain and Range of a Graph Explained

Step-by-Step Guide: How to Find Domain and Range of a Graph Function, How to Find the Domain and Range of a Graph


Step-by-Step Guide: How to find domain and range of a graph explained.


In algebra, every function can be represented as a graph on the coordinate plane. The graph of a function provides a visually representation of how the function behaves and gives you important information—including its domain and range.

This free Step-by-Step Guide on How to Find Domain and Range of a Graph Function will teach you everything you need to know about finding the domain and range of function by looking at its graph and it includes the following sections:

You can click on any of the quick links above to jump to a section, but we highly recommend that you work through each section in order to get the most out of this free guide.

Now, let’s do a quick review of some important vocabulary terms and concepts that you will need to be familiar with in order to learn how to find the domain and range of a graph.


Figure 01: Before you can learn how to find the domain and range of a graph, you have to be familiar with interval notation.


What is Interval Notation?

Before we review the meaning of domain and range and how to find domain and range of a graph, it is important that you are familiar with interval notation.

Interval Notation is used to describe a certain set of numbers using either parenthesis or square brackets.

  • Square Brackets: When an endpoint is included in a given set of numbers, we use square brackets that look like [ or ].

  • Parenthesis: When an endpoint is not included in a given set of numbers, we use parenthesis that look like ( or ).

In this section, we will use simple inequalities to teach you to understand interval notation. We will then extend this understanding to using interval notation when finding the domain and range of a graph.

Let’s consider the inequality x>4 as shown on the graph in Figure 02 below.

  • Notice that all numbers greater than 4, but not including 4, are solutions to this inequality.

  • Also notice that the arrow extends to the right forever towards infinity and that there an infinite number of values that would satisfy this inequality (i.e. there are an infinite amount of numbers that are greater than 4.


Figure 02: The inequality x>4 (x is greater than 4) on the number line.


We could express the solution to the inequality x>4 verbally as:

  • x is greater than 4 (i.e. x can be any number greater than 4, but not including 4)

And we could express the solution to the inequality x>4 using interval notation as:

  • (4,∞)

Notice that, since 4 was not included in the solution set, we used parenthesis instead of square brackets.

Now let’s consider the inequality x≥4 as shown on the graph in Figure 03 below.


Figure 03: The inequality x≥4 (x is greater than or equal to 4) on the number line.


Notice that all numbers greater than 4, and including 4, are solutions to this inequality.

We could express the solution to the inequality x≥4 verbally as:

  • x is greater than or equal to 4 (i.e. x can be 4 or any number greater than 4)

And we could express the solution to the inequality x>4 using interval notation as:

  • [4,∞)

Notice that, since 4 was included in the solution set, we used square brackets instead of parenthesis.

The difference between the solutions to x>4 and x≥4 in interval notation are summarized in Figure 04 below. The key takeaway here is that you use parentheses when the endpoint is a number and is not included in the solution set and square brackets when the endpoint is a number and is included in the solution set.


Figure 04: Use parentheses when the endpoint is a number and is not included in the solution set and square brackets when the endpoint is a number and is included in the solution set.


Did you notice that you only have to differentiate between parentheses and brackets when the endpoint is a number?

In the case of infinity, you will always use parentheses since ∞ is not a definitive value or a true endpoint.

Next, let’s take a look at one more inequality: x ≤ 0 as shown on the graph in Figure 05 below:


Figure 05: The inequality x0 (x is less than or equal to 0) on the number line.


Notice that all numbers less than 0, and including 0, are solutions to this inequality.

We could express the solution to the inequality x0 verbally as:

  • x is less than or equal to 0 (i.e. x can be 0 or any number less than 0)

And we could express the solution to the inequality x0 using interval notation as:

  • (-∞,0]

When using interval notation, we have to identify the smallest value(s) on the left side and the largest on the right side. So, in this case of x0, we have to state on the left side that the smallest values are approaching negative ∞ and, on the right, the largest possible value is 0 (and, since 0 is included the solution set, we have to use a square bracket).

Figure 06 below illustrates a few more examples of the solutions of inequalities expressed in interval notation. Make sure that you are comfortable with interval notation before moving forward, as it is key to learning how to find domain and range of a graph function.


Figure 06: How to find domain and range of a graph starts with understanding interval notation.


What is Domain and Range?

Domain

In algebra, the domain of a function refers to the set of all possible x-values for that function.

For example, the function y=x² has a domain of (-∞,∞). This means that the domain includes all real numbers since any number can be squared (positive, negative, or zero) without any limitations.

Range

In algebra, the range of a function refers to the set of all possible y-values for that function.

For example, the function y=x² has a range of [0,∞) because any number squared, whether positive or negative, will always be greater than or equal to zero (the result can never be negative).


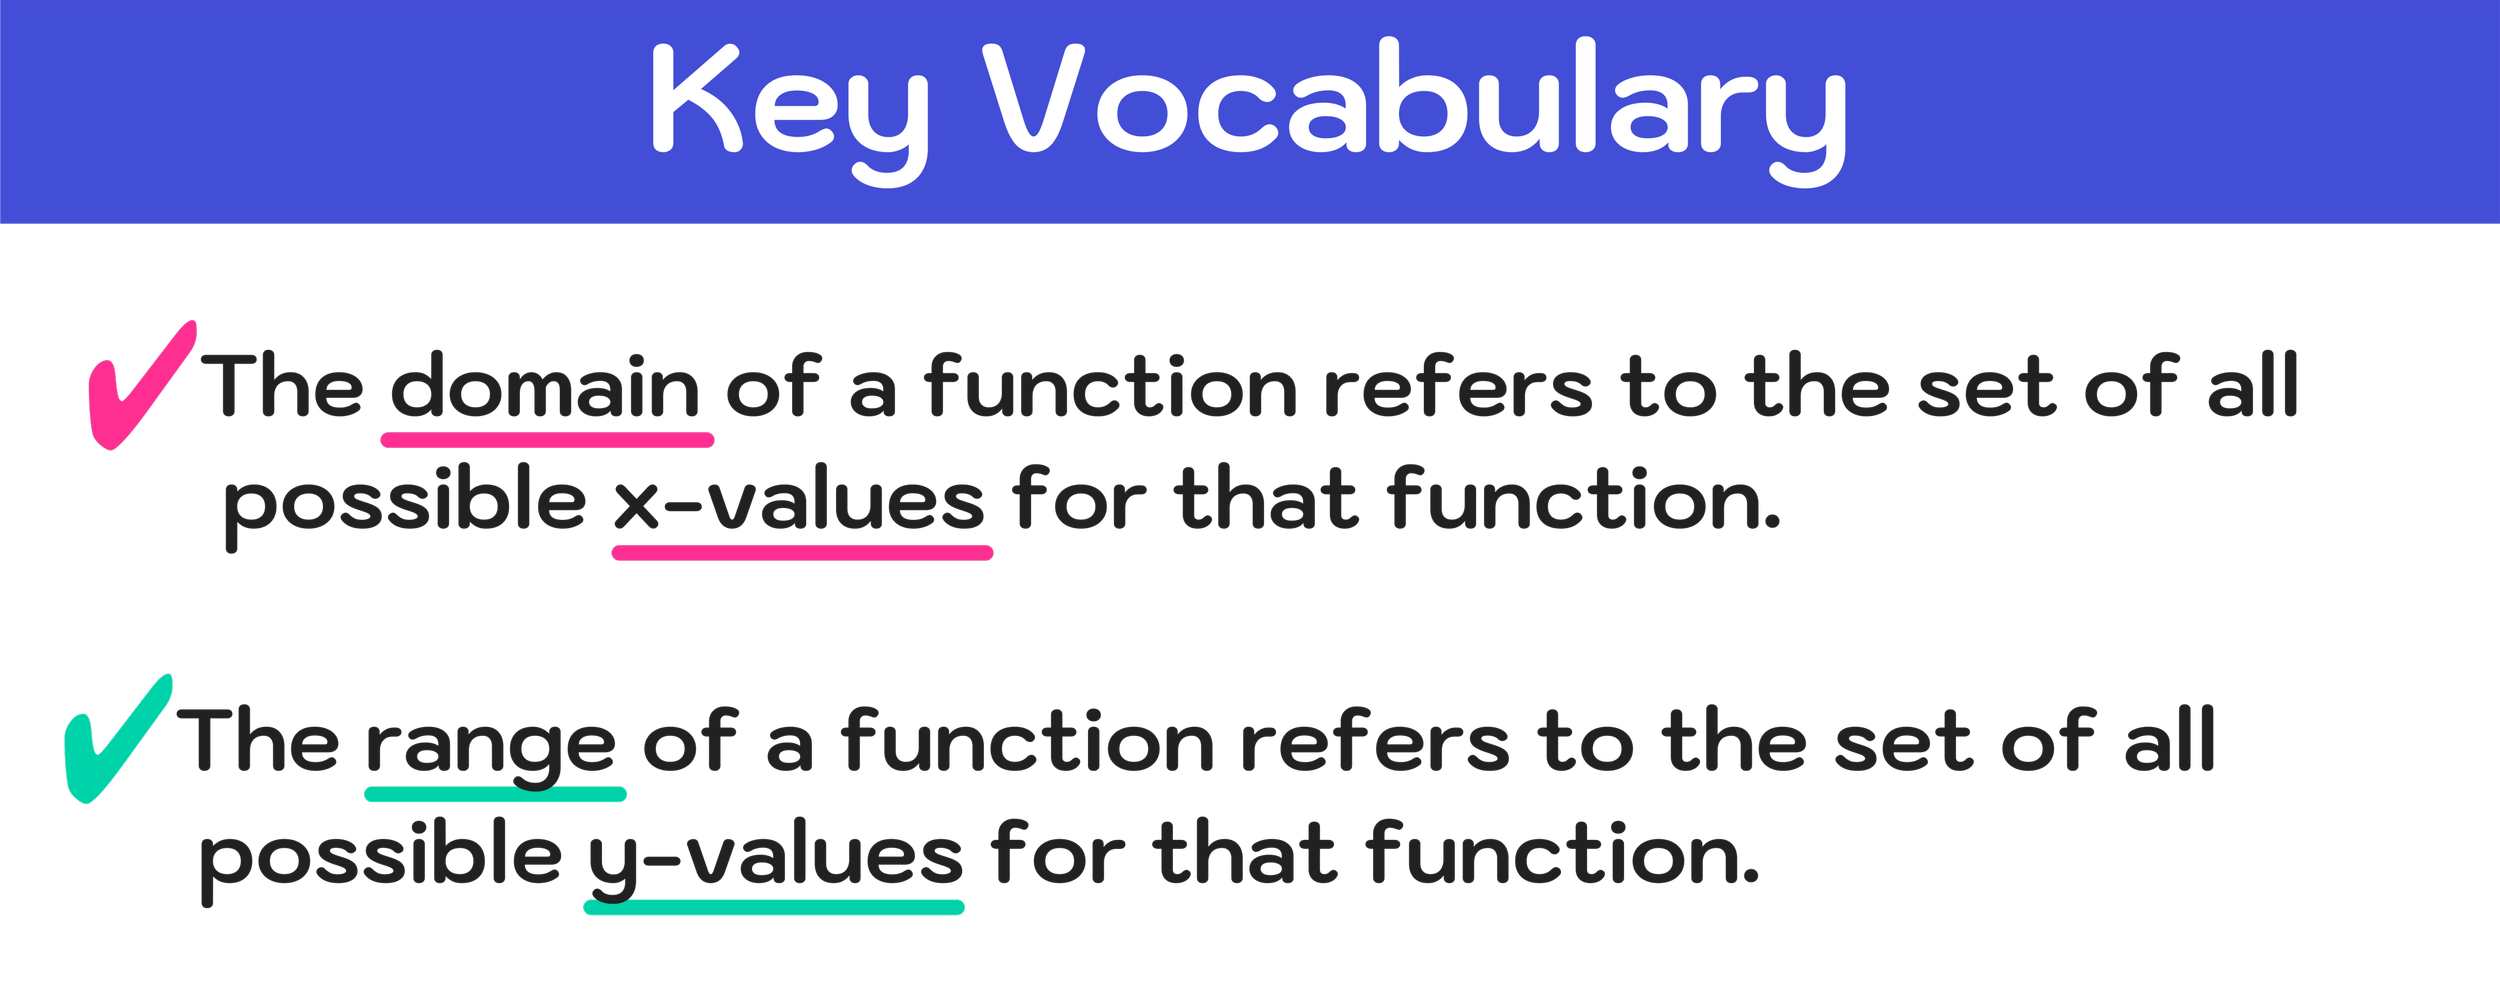
Figure 07: The domain of a function refers to the set of all possible x-values and the range refers to all possible y-values.


Now that you are familiar with interval notation and the meaning of domain and range, let’s go ahead and look at our first example.

For example #1, we will look at the graph of the function y=x². As previously stated, we already know the domain and range of y=x² are:

  • The domain of y=x² is (-∞,∞)

  • The range of y=x² is [0,∞)

Let’s see how we can verify that we are correct simply by looking at the graph of y=x².


How to Find Domain and Range of a Graph

Example #1: Find the Domain and Range of a Graph

For our first example, we are given the graph of the function f(x)=x^2 and we are tasked with finding the domain and the range (note that our answers must be in interval notation).


Figure 08: Find the domain and range of the graph of y=x^2.


Remember that the domain refers to all of the possible x-values, and the range refers to all of the possible y-values.

Let’s start with finding the domain of this graph. Notice that the graph is a parabola that extends forever on both the left and right-side of zero. This means that, as far as the x-axis is concerned, that the graph will extend forever to the left towards negative infinity and towards the right forever towards positive infinity.

What does mean? The graph will eventually cross through every possible value of x without any exceptions or limitations.

So, we can conclude that the domain of this function is (-∞,∞), as shown in Figure 09 below:


Figure 09: The domain of the graph is (-∞,∞), meaning that the graph will pass through every possible x-value.


Next, let’s find the range. Remember that the range refers to all of the possible y-values that the graph passes through.

Unlike the domain, the graph clearly will not pass through every possible y-value. The lowest y-value of this particular graph is the vertex, or turning point, of the parabola, which is at the origin.

So, the smallest possible y-value for this graph is 0 and the largest is infinity since it continues forever and ever in an upwards direction.

So, we can conclude that the range of this function is [0,∞), as shown in Figure 10 below:


Figure 10: The range of the graph is [0,∞), meaning that the graph will pass through every possible y-value that is greater than or equal to 0.


Now, we have confirmed that the function y=x^2 has a domain and range of:

  • Domain: (-∞,∞)

  • Range: [0,∞)

Now let’s move onto another example where we gain more experience with how to find domain and range of a graph.


Example #2: Find the Domain and Range of a Graph

For our next example, we have to find the domain and range of the graph of the function f(x)=-|x|.


Figure 11: How to Find the Domain and Range of a Graph Example #2


The domain of the graph refers to all of the possible x-values.

Just like the previous example, the graph will pass cross through every possible x-value without any exceptions or limitations, so we can conclude that:

  • Domain: (-∞,∞)

The range of the graph refers to all of the possible y-values.

Notice that this graph is similar to the graph in Example #1, except it is upside down. As far as the range is concerned, this graph has an upper limit at 0 and a lower limit at negative infinity since it extends forever and ever in a downward direction, so we can conclude that:

  • Range: (-∞,0]


Figure 12: The graph has a domain of (-∞,∞) and a range of (-∞,0].


In conclusion, the graph y=-|x| has the following domain and range:

  • Domain: (-∞,∞)

  • Range: [0,∞)

Are you starting to get the hang of it? Let’s continue onto the next example.


Example #3: Find the Domain and Range of a Graph

For our third example, let’s find the domain and range of the graph of f(x)=(1/4)x^3


Figure 13: How to Find Domain and Range of a Graph


Since this graph extends forever and ever in both directions left and right, we know that the domain of the graph will be all real numbers and we can conclude that:

  • Domain: (-∞,∞)

Similarly, the graph also extends forever and ever in both directions up and down, so we know that the range of the graph will also be all real numbers and we can conclude that:

  • Range: (-∞,∞)


Figure 14: Both the domain and range of the graph are (-∞,∞).


Final Answer: The domain and range of a graph with equation f(x)=(1/4)x^3 is:

  • Domain: (-∞,∞)

  • Range: [0,∞)


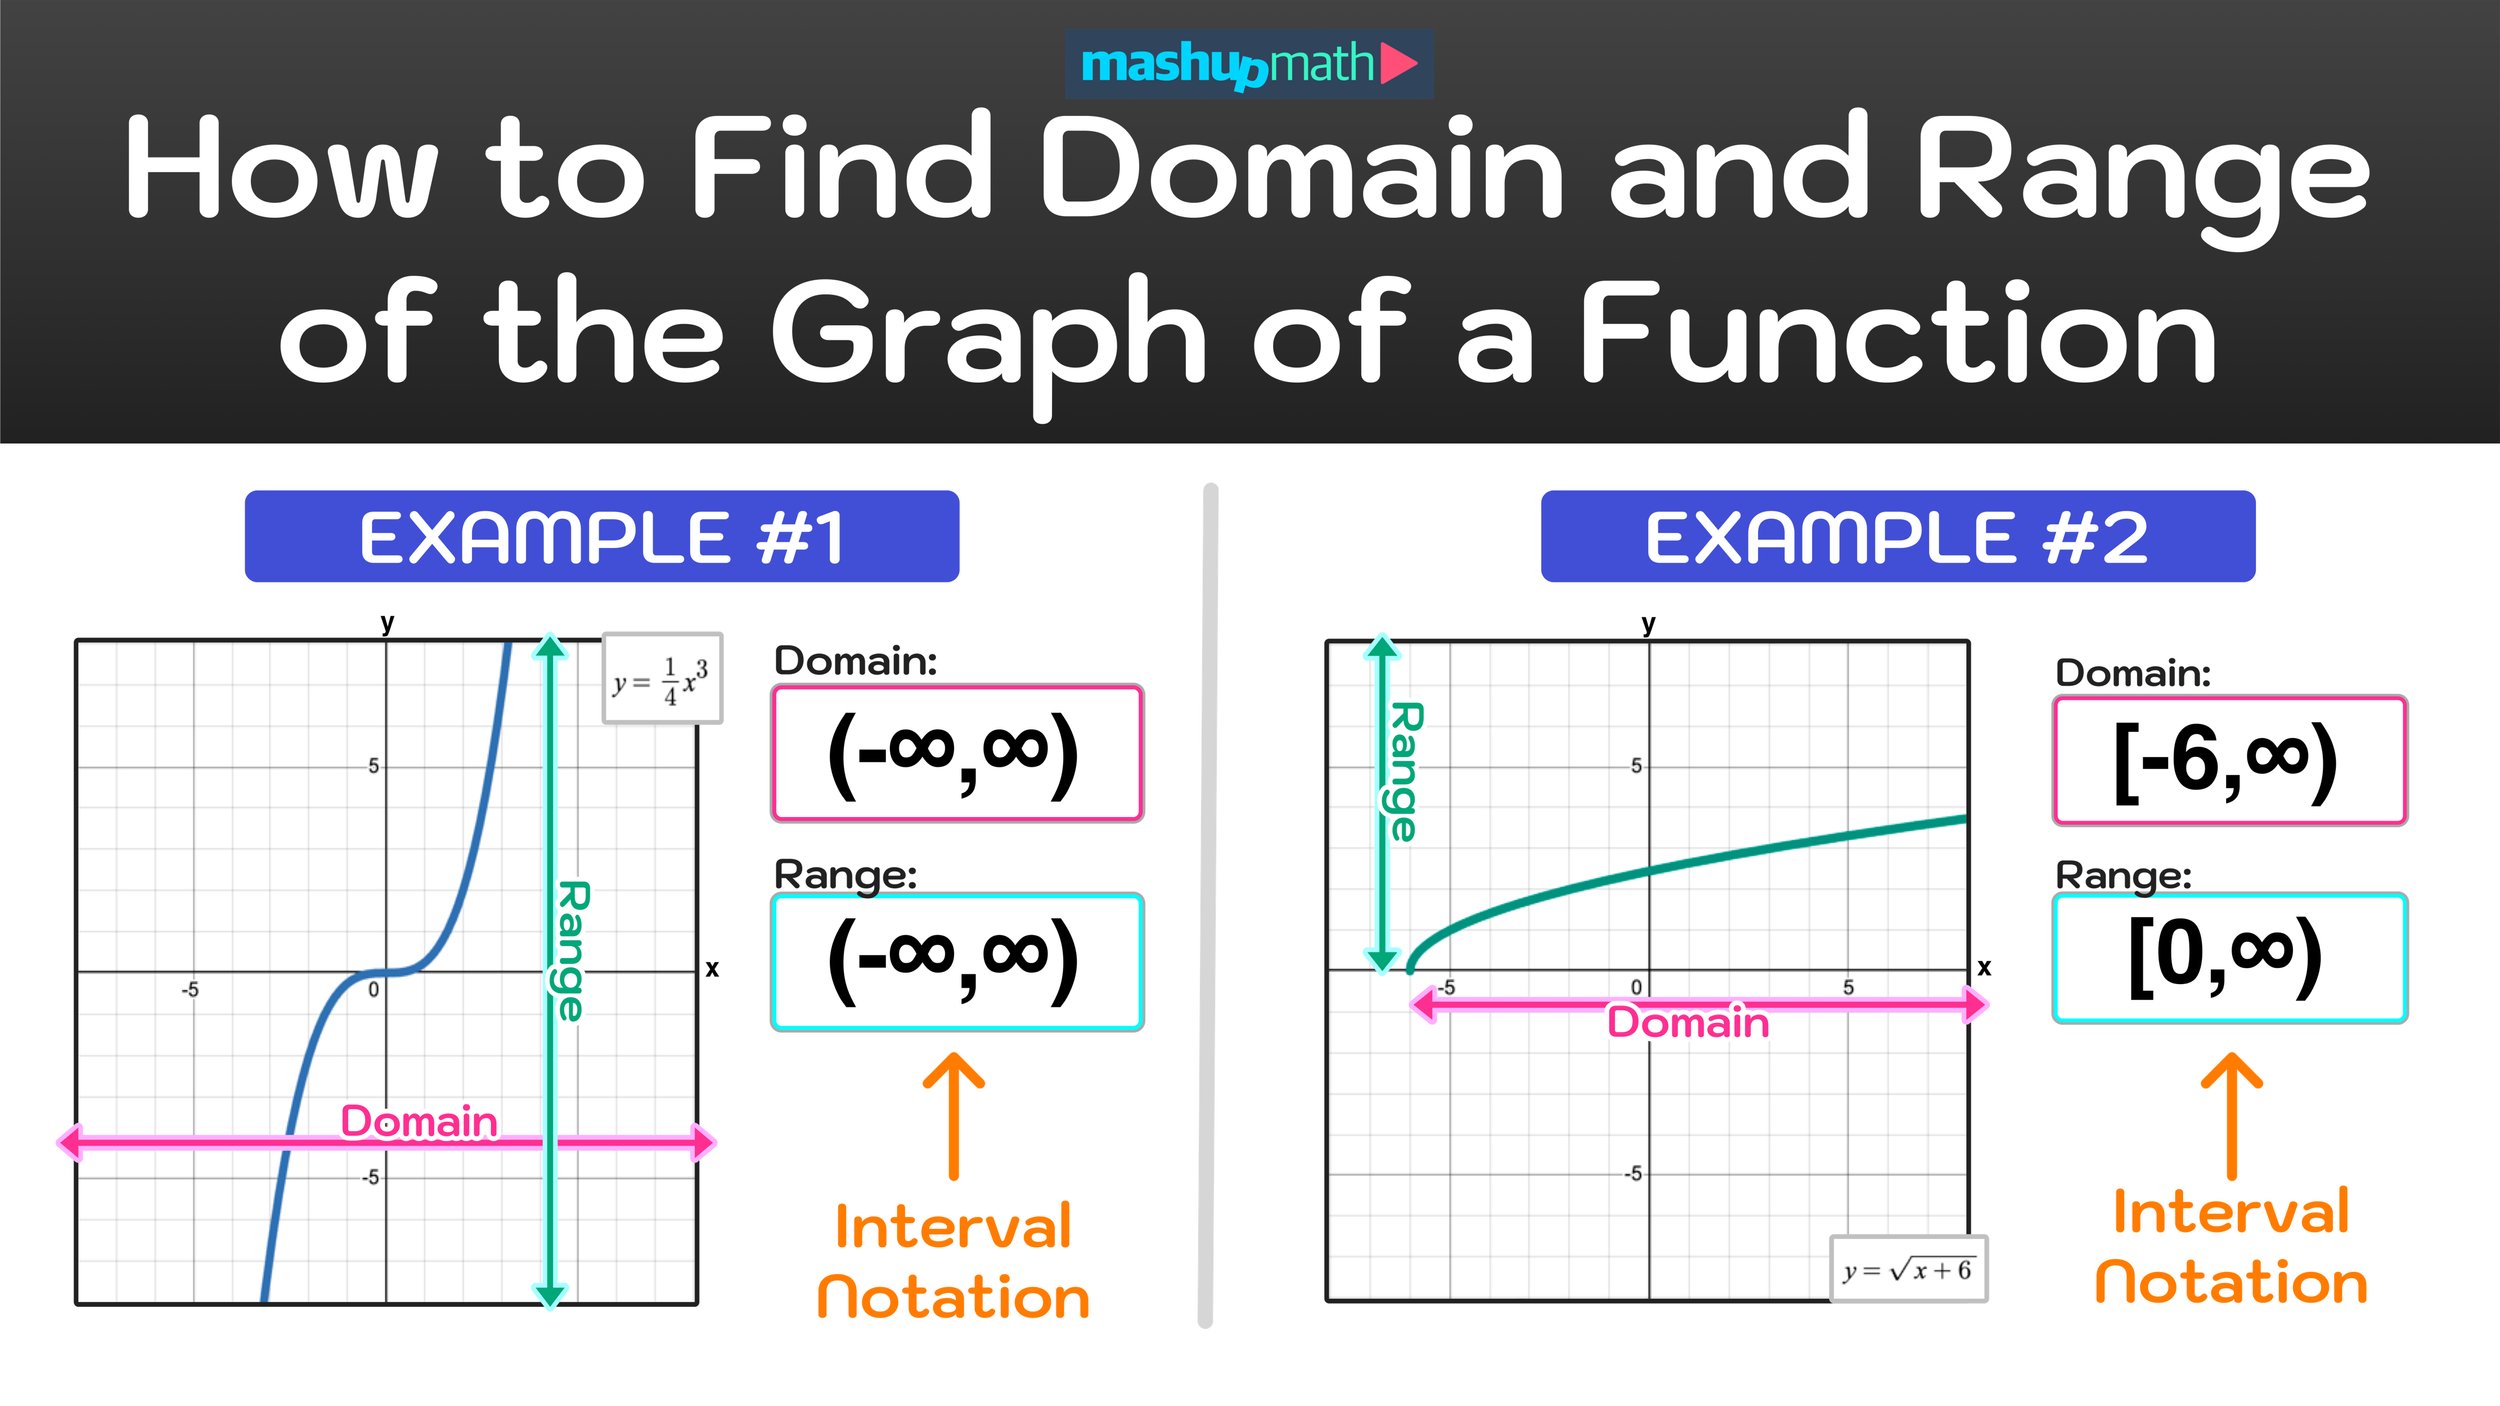
Example #4: Find the Domain and Range of a Graph

Moving on, we have to find the domain and range of the graph of f(x)=√(x+6)


Figure 15: How to find the domain range of a graph of f(x)=√(x+6)


The graph in our fourth example involves a function with a square root. Notice that, unlike the first three examples, the domain has some limitations.

Namely, the domain starts at -6 and extends forever to the right. So, in this case, the domain is not all real numbers. Rather, the domain is:

  • Domain: [-6,∞)

And, the range also has limitations and is not all real numbers. Notice that the y-values start at zero and extend forever in an upward direction, so we can conclude that the range is:

  • Range: [0,∞)


Figure 16: How to find the domain and range of a function graph explained.


Final Answer: The graph of the function f(x)=√(x+6) has a domain and range of:

  • Domain: [-6,∞)

  • Range: [0,∞)


Conclusion: How to Find Domain and Range of a Graph

Being able to identify the domain and range of a graph function and expressing the domain and range using interval notation are important and useful algebra skills.

In this free guide, we learned the definitions of the domain and range of a function, how to describe the domain and range of a function using interval notation, and how to find the domain and range of a graph of a function.

Key takeaways:

  • Domain and range are expressed using interval notation. When an endpoint is included in, we use square brackets and, when it is not, we use parentheses. Whenever -∞ or ∞ is an endpoint, we use parentheses.

  • Domain and range, when expressed using interval notation, always puts the smallest value/endpoint on the left and the largest value/endpoint on the right.

  • The domain of a function refers to the set of all possible x-values for that function and the range of a function refers to all of the possible y-values for that function.

  • When determining the domain of a function by looking at its graph, you need to look at its horizontal behavior (how it travels across the x-axis in both positive and negative directions).

  • When determining the range of a function by looking at its graph, you need to look at its vertical behavior (how it travels across the y-axis in both positive and negative directions).

That’s all there is to it! If you still confused about how to find the domain and range of a graph, we highly recommend going back and working through the practice problems again.

Keep Learning:

How to Find the Vertex of a Parabola in 3 Easy Steps

Learn how to find the coordinates of the vertex point of any parabola with this free step-by-step guide.


Comment

The Ultimate Guide to Passing the Texas STAAR Test

2 Comments

The Ultimate Guide to Passing the Texas STAAR Test

STARRTEST.jpg

How to Pass the Texas STAAR Test

This ultimate guide to passing your STAAR Test will help you understand how the exam works, how the questions are structured, and how to study so that you can not only pass the STAAR Test but earn an advanced score.

What is a STAAR Test?

The State of Texas Assessments of Academic Readiness (STAAR) Standardized Tests are given to students in Texas public elementary, middle, and high schools as a means of measuring student knowledge at each grade level.

What Grades are STAAR Tested?

The STAAR Tests knowledge and skills in reading, writing, math, social studies, and science. They are taken by all public school students in the state of Texas in grades 3 through12.

Is STAAR Test Mandatory?

STAAR Tests are mandatory for all public school students in Texas. Any private or charter school that does not receive funding from the state of Texas is not required to have students take STAAR exams.

How Long Are STAAR Tests?

Al students have four full hours to finish a STAAR test. The only exception to this rule is any end-of-course English exam, where students are given five hours.

Students are not permitted to leave if they finish early and are expected to sit quietly until the entire testing session has concluded.

What Happens If You Fail the STAAR Test?

The only students who are required to retake the STAAR Tests are 5th and 8th grade students who do not pass math and/or reading.

There are two opportunities provided to take the test during the school year, and if they don't pass the 2nd time, there is a meeting to determine if the student should attend summer school interventions, then retake it for the 3rd time or not. Often times the students are placed into the next grade level based on other assessment data gathered throughout the year. 8th graders who are in Algebra do not take the 8th grade Math STAAR. They will take the Algebra EOC to receive the high school credit for that course.

Image Source: wikipedia.org

Image Source: wikipedia.org

STAAR Tests Taken by High School Students

  • Algebra 1

  • United States History

  • English I

  • English II

  • Biology

Image Source: HoustonISD.org

Image Source: HoustonISD.org

STAAR Released Test for All Grade Levels

The best way to prepare for and eventually pass your STAAR Test is to get plenty of practice and familiarity with the format of the exams and the kind of questions you will see.

Use the links below to access released STAAR Test questions and answer keys.

3rd Grade Released STAAR Test and Answers: Math | Reading

4th Grade Released STAAR Test and Answers: Math | Reading | Writing

5th Grade Released STAAR Test and Answers: Math | Reading | Science

6th Grade Released STAAR Test and Answers: Math | Reading

7th Grade Released STAAR Test and Answers: Math | Reading | Writing

8th Grade Released STAAR Test and Answers: Math | Reading | Science | Social Studies

High School Released STAAR Test and Answers: Algebra 1 | English I | English II | Biology | U.S. History

Sample question from the 2018 Algebra I released STAAR Test. Source: tea.texas.gov

Sample question from the 2018 Algebra I released STAAR Test. Source: tea.texas.gov

STAAR Practice Test

Are you looking for more opportunities to practice for your STAAR Test? The links below share more opportunities to take a STAAR Practice Test for any subject:

3 Tips for Passing the Your STAAR Test

1.) view Released STAAR Tests and Released Tests

Many STAAR Tests (with corresponding answer keys) from the past several years are available for free online. Practice at home to gauge your readiness and identify areas of weakness that you can focus on while studying.

8th Grade Math STAAR Reference Sheet

8th Grade Math STAAR Reference Sheet

2.) Know Your Reference Sheets for Math

Familiarize yourself with the math reference guide prior to taking the STAAR Test and know what formulas are included (and what formulas are not).

The reference sheet is valuable because it saves you from having to memorize many important math formulas, which will save your time and energy while studying.

Pro Tip: If there is anything that you have memorized for the exam, write it down on your reference sheet as soon as the test begins. By transferring the information to paper, you are freeing up valuable mental energy that you can put towards the exam questions.

3.) Break Up Your Studying

Cramming for a big test may do more harm than good. To learn more about the negative consequences of cramming, check out Why Cramming for Tests Often Fails by BBC.

Rather than cramming, try spacing out your study sessions over many weeks leading up to your STAAR test.


Have any questions or ideas? Share your thoughts in the comments section below!

(Never miss a Mashup Math blog--click here to get our weekly newsletter!)

By Anthony Persico

static1.squarespace-1-1.png

Anthony is the content crafter and head educator for YouTube's MashUp Math . You can often find me happily developing animated math lessons to share on my YouTube channel . Or spending way too much time at the gym or playing on my phone.


STAAR_Pin.jpg
 

2 Comments

5 Awesome Math Teacher Gift Ideas

1 Comment

5 Awesome Math Teacher Gift Ideas

Math teachers love gifts!

Yes, it's true that everyone loves presents, but math teachers are notoriously underappreciated and even the smallest gesture fills them with warm fuzziness.

And if your son or daughter was lucky enough to have an awesome math teacher this school year, then you're probably thinking about getting her a gift as a token of your appreciation.

So, what's something that you can buy for your child's math teacher that she would actually want?

First, let me share from experience some things that teachers probably don't want. The list includes school supplies (we have enough already), chocolates and candy (we're all trying to lose weight before the summer), and regifted gift cards to gas stations and convenience stores (they don't excite us either).

If you're struggling to find math teacher gift ideas, the following items will help you show your gratitude and let that special teacher know that she is appreciated and made a difference in your child's development:

1.) Gift Cards (The Good Ones)

Gift cards are great, but they aren't all created equally. Teachers often receive gift cards to retail stores and restaurants that they don't like, and they end up collecting dust in a drawer somewhere. If you are going to get your child's teacher a gift card, be sure that it's for a good or service that he will actually enjoy. 

The best gift card I ever received was for a 90-minute massage!

The best gift card I ever received was for a 90-minute massage!

2.) Cute Tee Shirts & Hoodies

Teachers love cute and funny shirts and hoodies that let them express their quirky side and their passion for teaching math. For a truly unique gift, check out these limited-edition math teacher t-shirt and hoodie designs for men and women from Mashup Math (designed by math teachers for math teachers!): click here to get yours.

Funny shirts make a great gift for math teachers!

Funny shirts make a great gift for math teachers!

3.) Healthy Snacks

If you didn't know, teachers are always on diets and trying to avoid the sweets and baked goods that are constantly available in school faculty rooms, especially right before summer vacation. If you want to give food as a gift, share a gift basket full of healthy snacks or a one-month subscription to a health food service like NatureBox.

Healthy snacks are always preferred over candy and junk food.

Healthy snacks are always preferred over candy and junk food.


4.) Something Personalized

For a truly unique and one-of-a-kind gift, get your child's teacher a personalized keepsake to display in her classroom. You can find a ton of inexpensive DIY ideas as well as custom printed or embroidered teacher gifts on sites like Pinterest and Etsy.

This personalized pencil holder is available for $15.00 on Etsy.

This personalized pencil holder is available for $15.00 on Etsy.

5.) A Heartfelt Letter

It may sound cheesy, but the best gifts in life are often the ones that don't cost anything. While material gifts are always nice, they pale in comparison to a thoughtful, heartfelt letter that vividly describes the positive impact your teaching had on a particular student. These are the gifts teachers save for years and return to often for encouragement and inspiration.

Teachers love receiving heartfelt letters of appreciation from parents.

Teachers love receiving heartfelt letters of appreciation from parents.

Have any more ideas for awesome gifts for math teachers? Share your thoughts in the comments section below!

(Never miss a Mashup Math blog--click here to get our weekly newsletter!)


1 Comment

How to Subtract Fractions with Different Denominators (Step-by-Step)

Comment

How to Subtract Fractions with Different Denominators (Step-by-Step)

How to Subtract Fractions with Different Denominators

Math Skills: How to Subtract Fractions with Unlike Denominators in 3 Easy Steps


Subtracting Fractions with Different Denominators


Learning how to add and subtract fractions with different denominators is an important math skill that requires a strong understanding of fractions overall. After you learn how to subtract fractions with the same denominator, the next step is to learn how to subtract fractions with different denominators (i.e. how to subtract fractions with unlike denominators).

Subtracting fractions with the same denominator is a pretty straightforward task, but problems involving subtracting fractions with unlike denominators can be more challenging. However, the overall process for subtracting fractions with unlike denominators is a skill that can be mastered by learning a few simple steps and by working through practice problems (and this is exactly what this step-by-step guide will entail).

This free guide on How to Add Subtract with Different Denominators will teach you everything you need to know about subtracting fractions. Together, we will learn a simple 3-step strategy for subtracting fractions that you will be able to use to solve any subtracting fractions with unlike denominators problem.

While we highly recommend that you follow each section of the guide in order, you can click on any of the quick-links below to jump to a specific section.

Before we get started with learning the 3-step strategy or working on the practice problems, we will do a quick recap of fractions and what it means to subtract fractions with unlike denominators.

Recap: Subtracting Fractions with the Same Denominator

Let’s start by recapping two important vocabulary terms related to fractions:

Definition: The numerator of a fraction is the top number. For example, 2/3 has a numerator of 2.

Definition: The denominator of a fraction is the bottom number. For example, 2/3 has a denominator of 3.

Throughout this tutorial, we will make several references to the numerator and denominator of a fraction, so be sure that you have a firm understanding of these two vocabulary terms before going any further.


Figure 01: Every fraction has a top number (numerator) and a bottom number (denominator).


Subtracting fractions with the same denominator is a relatively simple task.

For example, consider the following problem where you have to subtract one fraction from another:

  • 3/4 - 1/4 = ?

Both of the fractions, 3/4 and 1/4, have the same denominator (i.e. both fractions have 4 as the denominator).

For examples such as this, if both fractions have a common denominator, all you have to do to solve the problem is to subtract the second numerator from the first numerator and keep the denominator the same. This can be done as follows:

  • 3/4 - 1/4 = (3-1)/4 = 2/4

Notice that our result, 2/4, can be simplified to 1/2 (since both the numerator and the denominator share a greatest common factor of 2, we can reduce by dividing both numbers by 2).

So, we can conclude that:

  • Final Answer: 3/4 - 1/4 = 1/2

Figure 02 below illustrates how we solved this problem. For a deeper dive into subtracting fractions with the same denominator, we suggest reviewing our free How to Subtract Fractions Student Guide before going any further.

The key takeaway from this review of how to subtract fractions with the same denominator is that whenever you are subtracting fractions with the same denominator, find the difference of the numerators and leave the denominator the same.


Figure 02: Subtracting fractions with the same denominator.


Now we are ready to move onto the next section, which will focus on how to subtract fractions with unlike denominators using a 3-step strategy.


How to Subtract Fractions with Unlike Denominators Step-by-Step

First, let’s recall the sample problem from the previous section when we reviewed how to subtract fractions with a common denominator:

  • 3/4 - 1/4 = ?

For this problem, we concluded that the answer is 1/2. Now, let’s look at another practice problem where the fractions have unlike denominators:

  • 3/4 - 2/8 = ?

Notice that, in this problem, one fraction has a denominator of 4 and the other has a denominator of 8 (i.e. the denominators are different).

However, if we compare both problems, we should notice that they are equivalent to each other. Namely, the second fraction in both problems represent “one-quarter” since 1/4 and 2/8 are equivalent fractions.

What does this mean? Both problems represent the difference of three-quarters and one quarter. However, the first problem has common denominators and the section problem does not.

With this difference in mind, we will go ahead and learn how to use a 3-step strategy for subtracting fractions with unlike denominators to solve this problem to see if we get the same result (i.e. the final answer is 1/2).


Figure 03: The expressions 3/4 - 1/4 and 3/4 - 2/8 are equivalent (i.e. they both represent “three-quarters minus one-quarter.”


How to Subtract Fractions with Unlike Denominators:

  • Step One: Find a common denominator by multiplying each fraction by the opposite fraction’s denominator.

  • Step Two: Subtract the second numerator from the first numerator and keep the denominator.

  • Step Three: Reduce the result if possible.

Now that you know the 3-step strategy for subtracting fractions with unlike denominators, let’s apply them to solving the problem 3/4 - 2/8 = ?.

Step One: Find a common denominator by multiplying each fraction by the opposite fraction’s denominator.

For step one, we have to find a common denominator.

Definition: In math, a common denominator is a common value that the denominators of both fractions can be divided into evenly.

While there are a few ways to find a common denominator between two fractions, the simplest way is to multiply the denominator of the first fraction by the second fraction and vice versa (i.e. multiply the denominator of the second fraction by the first fraction).

For the problem 3/4 - 2/8 = ?, we can use this approach to finding a common denominator as follows:

  • 3/4 - 2/8 = (3x8)/(4x8) - (2x4)/(8x4) = 24/32 - 8/32

Now we have a new equivalent expression, 24/32 - 8/32, where the denominators are the same. And, since the denominators of this new equivalent expression are the same, we can say that we have found a common denominator and we can move onto step two.


Figure 04: How to find a common denominator between two fractions.


Step Two: Subtract the second numerator from the first numerator and keep the denominator.

For the second step, we will focus on our new expression where the fractions share a common denominator of 32:

  • 3/4 - 2/8 → 24/32 - 8/32

From here, we can solve 24/32 - 8/32 by finding the difference of the numerators and leaving the denominator the same:

  • 24/32 - 8/32 = (24-8)/32 = 16/32

Step Three: Reduce the result if possible.

Lastly, we have to check and see whether or not our result, 13/15, can be simplified. Since both 16 and 32 share a greatest common factor of 16, we can divide both the numerator, 16, and the denominator, 32, by 16 to get an answer in reduced form:

  • (16÷16)/(32÷16) = 1/2

So, we can conclude that:

Final Answer: 3/4 - 2/8 = 1/2


Figure 05: How to Subtract Fractions with Different Denominators in 3 Steps.


Our final answer should look familiar. Remember that we already knew that our answer would be 1/2 since we know that three-quarters minus one-quarter equals one-half. The key takeaway here is understanding that our 3-step strategy will allow us to correctly solve any problem where you are tasked with subtracting fractions with the same denominator.

Now, let’s go ahead and get some more practice using the 3-step strategy for subtracting fractions with unlike denominators.


How to Subtract Fractions with Different Denominators Example #1

Example #1: 4/5 - 2/3

For this first example, we want to find the difference between four-fifths (4.5) and two-thirds (2/3). To solve this problem, we can use of 3-step strategy as follows:

Step One: Find a common denominator by multiplying each fraction by the opposite fraction’s denominator.

First, we have to find a common denominator by multiplying the denominator of the first fraction (5) by the second fraction (2/3) and then by multiplying the denominator of the second fraction (3) by the first fraction (4/5):

  • 4/5 - 2/3 = (3x4)/(3x5) - (5x2)/(5x3) = 12/15 - 10/15

Notice that we now have a new equivalent expression with common denominators (i.e. both fractions have the same denominator, which, in this case, is 15).

  • 4/5 - 2/3 → 12/15 - 10/15

Step Two: Subtract the second numerator from the first numerator and keep the denominator.

For the second step, we can solve 12/15 - 10/15 = ? as follows:

  • 12/15 - 10/15 = (12-10)/15 = 2/15

Step Three: Reduce the result if possible.

And now, for the final step, we just have to see if the result, 2/15, can be simplified. Since 2 and 15 do not have any factors in common (other than 1), this fraction is already in reduced form and can not be simplified further. Therefore…

Final Answer: 4/5 - 2/3 = 2/15

The entire 3-step process for solving this first example is illustrated in Figure 06 below:


Figure 06: How to Subtract Fractions with Unlike Denominators


How to Subtract Fractions with Unlike Denominators Example #2

Example #2: 3/7 - 2/9

Just like the last example, we can use our 3-step strategy to solve this problem.

Step One: Find a common denominator by multiplying each fraction by the opposite fraction’s denominator.

To find a common denominator, we can multiply the first fraction, 3/7, by the denominator of the second fraction, 9, and then multiply the second fraction, 2/9, by the denominator of the first fraction, 7, as follows:

  • 3/7 - 2/9 = (9x3)/(9x7)-(7x2)/(7x9) = 27/63 - 14/63

Now we have found an expression that is equivalent to the original problem:

  • 3/7 - 2/9 → 27/63 - 14/63

Step Two: Subtract the second numerator from the first numerator and keep the denominator.

Next, we can go ahead and solve 27/63 - 14/63 as follows:

  • 27/63 - 14/63 = (27-14)/63 = 13/63

Step Three: Reduce the result if possible.

For the very last step, we just have to see if our result, 13/63, can be simplified any further. Notice that 13 and 63 do not share any common factors besides 1, so we can conclude that 13/63 can not be simplified and:

Final Answer: 3/7 - 2/9 = 13/63

All of the steps for solving this second example are detailed in Figure 07 below.


Figure 07: Subtracting Fractions Explained!


Are you feeling more confident with using the 3-step strategy to subtract fractions with unlike denominators? If not, let’s go ahead and gain some more experience by working through one more practice problem.


How to Subtract Fractions with Different Denominators Example #3

Example #3: 7/8 - 4/24

For this last example, we can again use the 3-step strategy to solve it:

Step One: Find a common denominator by multiplying each fraction by the opposite fraction’s denominator.

First, we can find a common denominator by taking each fraction and multiplying it by the denominator of the opposite fraction:

  • 7/8 - 4/24 = (24x7)/(24x8) - (8x4)/(8x24) = 168/192 - 32/192

Now we have a new expression where both fractions share a common denominator:

  • 7/8 - 4/24 → 168/192 - 32/192

Step Two: Subtract the second numerator from the first numerator and keep the denominator.

Next, we have to solve:

  • 168/192 - 32/192 = (168-32)/192 = 136/192

Step Three: Reduce the result if possible.

One more step! To wrap this problem up, we have to try and simplify 136/192. We know that this fraction can be reduced since both 136 and 192 share 2 as a common factor. However, they actually share a greater common factor, which is 8. So, after we divide the numerator, 136, and the denominator, 192, by 8, we are left with 17/24, and we can conclude that:

Final Answer: 7/8 - 4/24 = 17/24

The complete step-by-step process of solving Example #3 is illustrated in Figure 08 below.


Figure 08: How to Subtract Fractions with Different Denominators


Conclusion: How to Subtract Fractions with Different Denominators

Subtracting fractions with unlike denominators is a foundational math skill that every student must master when learning how to perform operations with fractions.

This step-by-step tutorial on subtracting fractions focused on teaching you how to find the difference between two fractions that do not have the same denominator.

To solve problems where you have to subtract fractions with unlike denominators, we used the following 3-step strategy:

  • Step One: Find a common denominator by multiplying each fraction by the opposite fraction’s denominator.

  • Step Two: Subtract the second numerator from the first numerator and keep the denominator.

  • Step Three: Simplify the result if possible.

These three steps were used to solve the three example problems in this guide. They can also be used to solve any subtracting fractions problems that you may come across, so be sure to keep them in your notes and practice using them as often as you can!

Keep Learning:


Comment

Why Every Teacher Should Say "No" More Often

Comment

Why Every Teacher Should Say "No" More Often

Why Every Teacher Should Say “No” More Often

The importance of setting boundaries and avoiding teacher burnout.

However, as a teacher, you have the right to say '“no” to unreasonable requests without feeling guilty.

Dedicated teachers are in short supply and students, parents and administrators are masters of—often unfairly— squeezing every last drop of energy from them.

Teaching is an important and rewarding profession, but the job is also incredibly demanding. Teachers of all grade levels are saddled with an overwhelming amount of daily responsibilities that extend way beyond their duties inside of the classroom. In an effort to be a team player (and often in fear of not letting others down), many teachers struggle with setting healthy boundaries, which often leads to intense exhaustion and burnout before the school year is over.

However, as a teacher, you have the right to say '“no” to unreasonable requests without feeling guilty.

Setting Boundaries

While it’s true that teaching is an inherently selfless profession and many teachers view themselves as servants to their students, schools, and communities, it is also true that well-balanced students have well-balanced teachers. 

It can be hard to say to taking on more responsibilities, but one of the best reasons for learning to say “no” more often is to conserve and prioritize your energy. Your energy is a finite resource and the mental and emotional demands of teaching are taxing enough. Every time to agree to take on an additional responsibility or task, you are giving away more and more of your precious energy, leaving your students with a lesser and more exhausted version of you.

When you learn to set healthy boundaries and decline any requests for commitments that will leave you overextended, you will have more time and energy to focus on your primary task—teaching your students.


When the demands of being a teacher prevent you from setting healthy boundaries, you are at increased risk of reaching a point of burnout.


Burnout and Selective Engagement

What happens to teachers who never learn how to set healthy boundaries? Many of them experience teacher burnout—a persistent state of stress causing feelings of cynicism, detachment, and both mental and physical exhaustion. Teacher burnout leads many teachers to feel helpless, ineffective, and incapable of being an effective educator.

When the demands of being a teacher prevent you from setting healthy boundaries, you are at increased risk of reaching a point of burnout. However, learning how to say “no” and set personal and professional boundaries will allow you to reach a healthy work-life balance where you don’t constantly feel like you are overcommitted or stretched too thin.

The best way to maintain such a work-life balance and healthy boundaries is through something called selective engagement.

Selective engagement is when a teacher chooses to focus on the roles and responsibilities that have the greatest impact on their students and their school community. This doesn’t mean that a teacher should say no to every request that does directly relate to her classroom teaching responsibilities. However, it does mean that teachers must be realistic about how much time and energy that have to give and that they should thoughtfully choose to give their attention to responsibilities that will not lead them to teacher burnout.


One major benefit of setting boundaries is that your students will receive higher quality classroom instruction and lesson planning from a teacher who is able to be energized, present, and focused.


Strategies for Saying “No”

Saying “no” can be difficult, which is why many consider it an artform in itself.

In Kenny Nguyen's TED Talk, The Art of Saying No, the practice of declining certain requests is the key to saying yes to others. If you have set priorities for your students and yourself and expect to get through the school year with your stamina and sanity intact, then you simply can not say 'yes' to every request. 

Whenever you say “yes” to one thing, you are saying “no” to everything else. And, conversely, whenever you say “no” to one thing, you are effectively saying “yes” to your other commitments. In essence, the less commitments that you make allows you to give more of yourself to the commitments that you currently have.

Need some help with setting healthy boundaries and learning how to say “no” more often? Here are some helpful strategies for saying “no” without feeling guilty:

  • Be Direct: Whenever saying “no”, it’s important to be clear and concise in your response. Never half-commit or leave any room for misinterpretation.

  • Decline with Grace: Always express gratitude for whatever opportunity you are declining and be respectful.

  • Don’t Over-Explain: Never feel like you have to give a detailed explanation justifying why you can’t commit to something if you don’t want to.

  • Share Alternatives: If possible, you can make suggestions for other solutions or staff members who may be available to help.

Setting Boundaries Will Make You a More Effective Teacher

When you learn to set healthy and effective boundaries, the positives greatly outweigh the negatives. One major benefit is that your students will receive higher quality classroom instruction and lesson planning from a teacher who is able to be energized, present, and focused.

Great teachers, of course, are team players, and saying 'no' sometimes won't change that. Understanding where your limits are and never feeling guilty about putting a cap on how far you're willing to extend yourself is the key to being a healthy and effective educator.

Otherwise, like many teachers often do, you can fall victim to exhaustion and burnout towards the middle/end of the school year, leaving you feeling overwhelmed, unhappy, and ineffective. You just may find out that saying 'no' more often prepares you for the perfect times to say 'yes'!

Do you think it's important for teachers to learn to say 'no' more often? Share your thoughts in the comments section below!

(Never miss a Mashup Math blog--click here to get our weekly newsletter!)

More Education Insights You Will Love:

Comment